Determining edge and feature locations of a workpiece is critical to proper machine setup. In fact, little else matters in terms of machining parameters if the cutting tool doesn’t know exactly where to start. In a best-case scenario, the result might be an out-of-tolerance part, and the worst case, a broken tool or even a machine crash.
From early on, shops have and continue to use mechanical edge finders to determine the locations of a workpiece’s edges and features. The process requires operators to clamp the device to the machine spindle, run at a slow rpm and jog the edge finder until it lightly contacts the part. To determine the precise locations, however, operators must subtract half the diameter of the edge finder from their recorded measurements before zeroing the location – a step sometimes missed.
Additionally, mechanical edge detection poses two other potential problems. First, it is slow. Setting the device, starting the machine and carefully contacting the workpiece at the appropriate points takes time away from making chips. Secondly, the process is only accurate to a certain point. Lastly, accidentally operating the machine above the recommended rpm range during the location process risks damaging the edge finder and the possibility of injury.
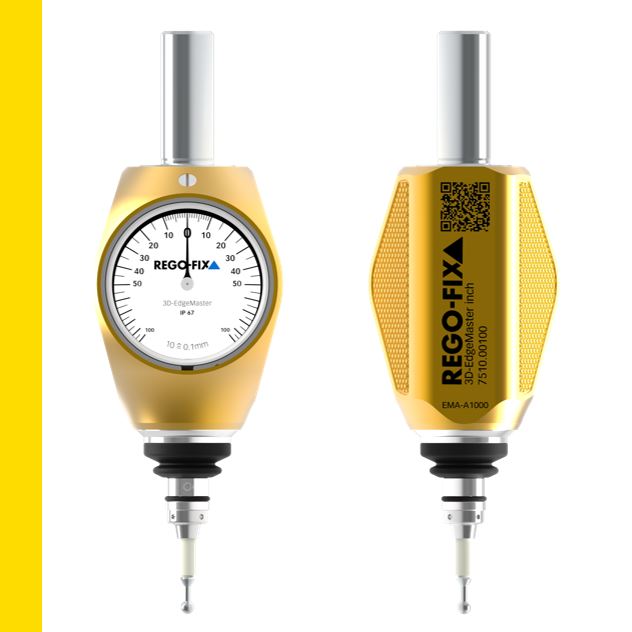
To improve precision and significantly shorten setup times, the REGO-FIX 3D-EdgeMaster precision centering device provides fast, precise probing and detection of workpiece reference edges, setting of the zero point and measuring with repeat accuracy of £ 0.01 mm. It allows operators to quickly adjust runout by setting the X and Y axes, calibrate measuring paths, center machine axes and determine bore centers. The device also has Z-axis capability to measure workpiece height.
Available in either inch or metric versions, with a 5/8-inch or 16 mm shank, respectively, the 3D-EdgeMaster is shockproof and splashproof in compliance with IP 67 regulations and features an easily replaceable ceramic probe designed with a predetermined break point to protect its inner mechanism. Each device carries its own unique engraved serial number and QR code that provides users with product information and the unit’s inspection certificate via the REGO-FIX website.
The 3D-EdgeMaster is just one in a portfolio of REGO-FIX metrology and measuring technology offerings that includes MasterBar test arbors for machine-spindle calibration that increases CNC quality and minimizes scrap and downtime.
Like its premium toolholding systems, the REGO-FIX line of metrology products is designed, manufactured and tested at its ISO-certified facility in Tenniken, Switzerland, to comply with exacting standards. Follow this link to learn more about the 3D-EdgeMaster measuring technology and download our free product brochure.

